3D-Pipeline
I call my idiosyncratic method: Mudbox Machinima.
Machinima (for those who don’t know) arose when game users
began to produce short 3D movies using the capture tools inside the
games. Basically it involves re-purposing a tool/game for a use not
foreseen by its creators. Mudbox is the name of a 3D modelling software, designed for quick intuitive clay-like sculpting of 3D characters.
Mudbox Machinima involves re-purposing Mudbox (the sculpting tool) as an animation tool.
To do so is a mildly-elaborate multi-software process. It begins with creating a simple model in Maya; the model is then exported for use in Mudbox. (Detailed instructions for how to create a text model compatible with Mudbox are given below.)
In Mudbox, the background is set to a classic blue-screen color and the
grid hidden. A screen-capture tool (Camtasia) records a video of the
sculpting. The resulting video is imported into a video editing
software (in my case: Sony Vegas) and a chroma key is applied to remove
the background. Shadow is created by duplicating the Mudbox-film layer,
removing its color and contrast, rotating it in 3D, changing its
opacity and applying a small amount of blur
From Maya to Mudbox: a pictorial pathway.
In the pLife post, I exultantly proclaimed that the entire thing took me a day; that is a bit of a white lie. The previous 2 days had been spent making aborted experimental attempts to move text between Maya and Mudbox.
As usual my primary motivation for all that seemingly futile work was laziness.
I wanted a quick way of creating the base models. And I wanted a quick
way to render out animations. Rendering anything from Maya takes time,
lots of it: lights must be made and tuned, backgrounds created,
animations keyed, textures applied. And Maya does not have the
quick-sculpting dynamic tools of Mudbox (or the capability to set the
background to green-screen) so doing a screen capture is just not
feasible in Maya.
Unfortunately, it’s also impossible to create text in Mudbox without
sculpting it up from scratch. So text must be created in Maya then
exported in obj format for Mudbox. In Maya, the problem is that the text comes in diverse types
(poly, nurbs, subdiv); Mudbox will only accept poly, and polys with
4-sided faces, welded meshes and clean normals; models in any other
form are missing faces or severely deformed when imported into Mudbox;
Maya’s text created with the default settings appears as tattered
wreckage. In spite of the fact that Maya and Muudbox emerge from the
same company, no simple tutorials exist for a text-model pathway
between them; so I reluctantly began the arduous task of testing all
the potential types to see which might work.
The following images reveal the path I found;
there are probably other even-easier quicker paths, but this path
produces reasonable text with no holes. Hopefully it will eliminate a
few hours of parameter twitching for future text-warpers.

Step 1: Open the 'Text' creation dialog box under the 'Create' menu. Be sure to click on the little box otherwise it will create the default text.

Step 2: Text creation settings. The text at the top ('hope' in this example) is whatever word you want. The font is crucial: some of the bevel options will fail on some fonts; with some fonts open space in letters like 'e' or 'a' will be filled over when imported into Mudbox. Arial is a safe choice. The width, depth and extrude distance can all be changed. The bevel type can be changed but some combinations will lead to weirdnesses. The text can also be created using curve then extruded but that involves extra steps and led to other dilemnas so I avoid it. When ready, click on 'Create' and this box will close and the text will appear on stage.

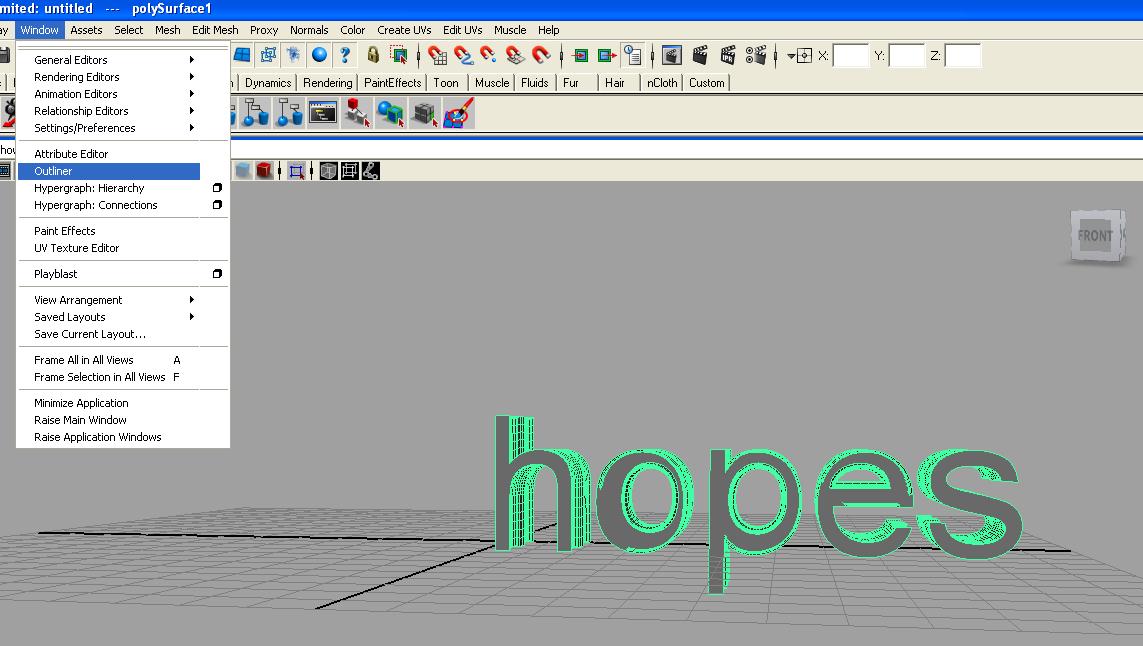
Step 3: For any Maya novices, here is the path to the necessary 'Outliner' which allows you to select or deselect objects.

Step 4: Once the 'Outliner' is open select your newly-created text.

Step 5: This step is crucial. Note that the dropdown at the top left is set 'Polygons', this brings up the polygon menus. Under 'Mesh' select 'Cleanup'. --It is possible to also use the weld tool and search out all sorts of irregularities (like seams that are not cleanly joined) but that also involves work, lots of it, and time, lots of it. Purer less-time-weary craftsman than myself may consider such voyages necessary, but on this quick path to rendering, Cleanup is an essential shortcut.

Step 6: The Cleanup dialog box is a land of mysteries but these settings will produce a reasonable model that looks something like itself in Mudbox.

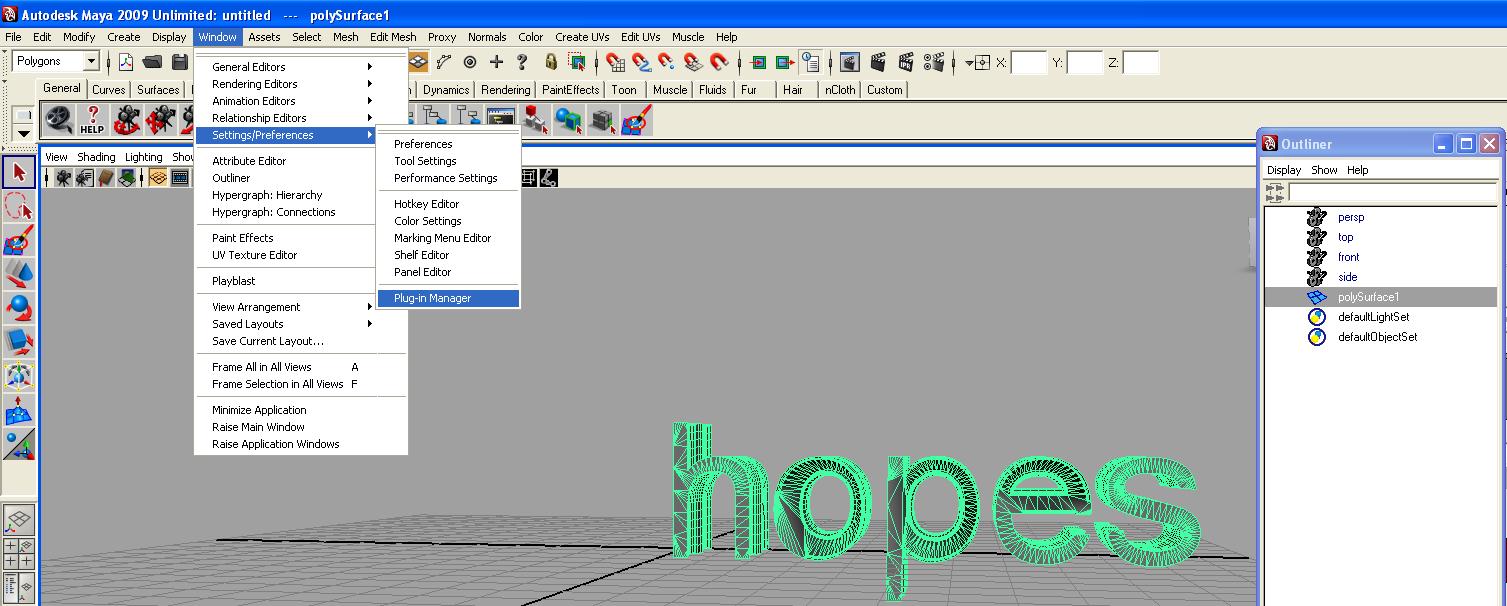
Step 7: Enabling the model for export from Maya involves activating the export obj plugin under 'Windows' 'Settings' 'Plug-in Manager'. This step only needs to be done once, from that point on Maya will permit the exporting of .obj models.

Step 8: Scroll down the list in Plug-in manager window to 'ogjExport.mll' and make sure both 'Load' and 'Auto-Load' are ticked.

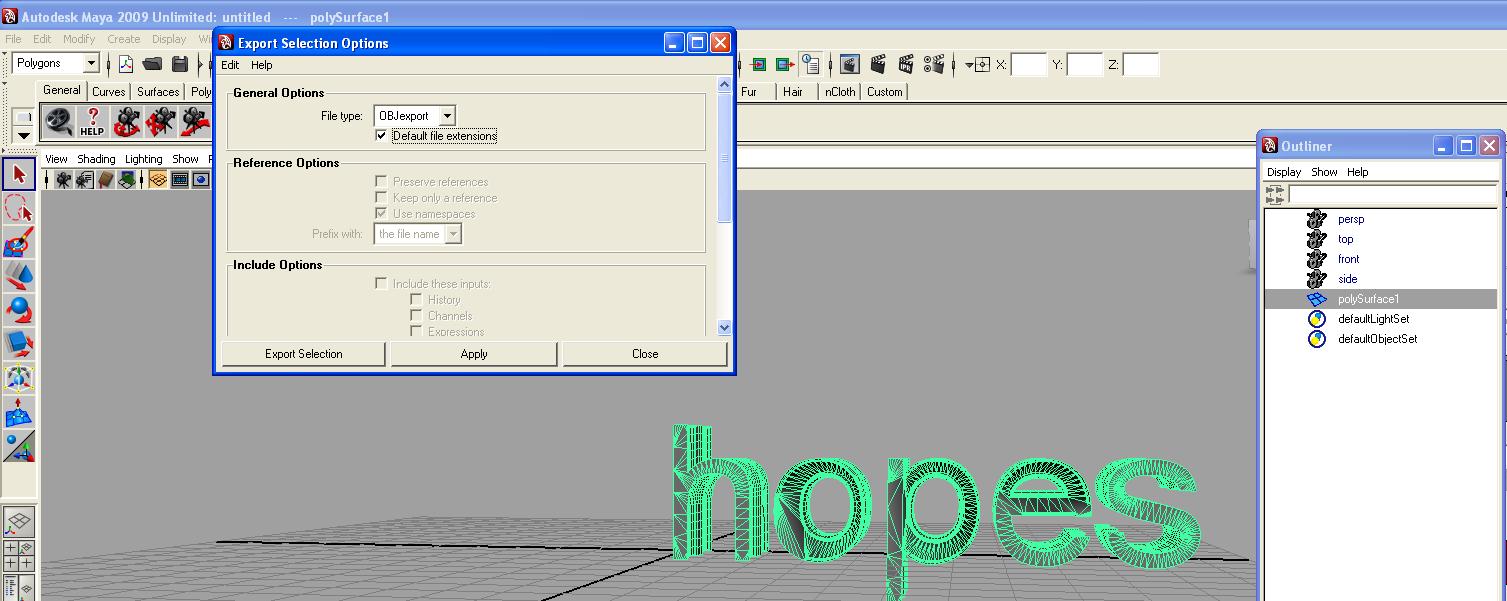
Step 9: Last step: with your model selected goto 'File' --> 'Export Selection', select 'obj' in the dropdown list, press 'Export Selection'.